What is star trail photography really? Well it’s pretty basic and real easy to accomplish. It is 100’s of photos stacked on top of one another using software to create trails in sky. The trails are actually stars front to end and because they are stacked on top of one another it makes a line in the sky. This tutorial will help you to create your own star trail photograph as easy as possible.Now please note, that this is aimed at beginners and that there are a lot of ways to accomplish these quite extraordinary photos.

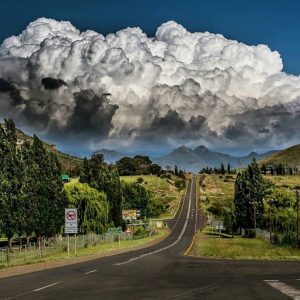
- Star Trails in Bloemfontein
Introduction
Since the earth rotates, the stars are not fixed in place. They move with the earth’s rotation and appear to move around the north and south poles in the sky. This means you can photograph star constellations, but after about 15 seconds, you will start to get blurring in your stars because of the movement of the Earth.
If you know where Polaris (The North Star) is located, you can point your camera in this direction and, using long exposure times, you will get circular star trails instead of blurry constellations.
Ok got the right stars now?
So now you go to a spot where there is little or no outside light pollution, otherwise your camera will pick up the extra light and the shot will be pretty much useless.
A few things you need to know before you start taking star trail photos.
Aperture: this is your f stop size ex: F2.8 / F3.5 / F5.0 depending on focal length
The “smaller” your aperture number F2.8 – the more light will be let through. The bigger your aperture ex F22, the less light will be let through
ISO:
What ISO denotes is how sensitive the image sensor is to the amount of light present. The higher the ISO, the more sensitive the image sensor is and therefore the possibility to take pictures in low-light situations. The lower your ISO ex 100, the better quality photo you will get, the higher the number ex: 3200, the more noise your photo will have,. Noise on a photo looks like tiny little dust marks on your photo which makes for a poor quality photo. Some new digital cameras can have a ISO of up to 26 000, which means you can take photos in almost zero visibility conditions.
Shutter Speed:
If you have a DSLR camera you will be able to set the shutter time. The time you set it is how long the shutter will stay open to capture the image. The longer it is open, the more light will be let through. The shorter, the less light. Sport photographers usually use the fastest shutter speed available so that they can “freeze time” in a fraction of a second. We on the other hand want a longer shutter speed because we are taking photos at night and need all the light we can get.
White Balance:
White balance is the process of removing unrealistic colour casts, so that objects which appear white in person are rendered white in your photo. Proper camera white balance has to take into account the “colour temperature” of a light source, which refers to the relative warmth or coolness of white light. Our eyes are very good at judging what is white under different light sources, but digital cameras often have great difficulty with auto white balance (AWB) — and can create unsightly blue, orange, or even green colour casts. On your camera you will be able to set this to different settings.
Focusing:
You can either have auto focus (in smaller digital cameras) or you can have to option to choose between auto focus or manual focus. This insures that your picture is not blurry and stays clear.
Ok so now that we have covered that, back to the camera settings.
When i shoot stars, I use my 18mm – 55mm lens. You can go much wider if you have one.
My settings are:
Aperture: F4
ISO: 100
Shutter Speed: varies between 15seconds and 25 seconds – depends on how much light is available.
If your camera has a bulb setting you can also use this, but i would not recommend it as you need to touch the camera during shooting and this can blur the photos.
White Balance: user preset. Do not use auto white balance because very time the camera detects a new white and this make your photos different light colours.
Focusing: I use manual focus/infinity.
And a very sturdy tripod.
And a lot of battery power.
Remember – star trails are made up of 100’s of photographs and your camera needs the power!
Ok so now –you located the north star or all the stars for that matter.
Put your camera on your tripod and try to select your scene. You can focus on a tree in front or buildings far off. Now remember the rule of thirds and make sure you get a couple of stars in your shot.
Set your camera to the manual setting and set all the settings as describe above. You can of course try your own settings but these are a great way to start.
Now to get the focus correct – what i usually do is select a spot i can see through , my live view screen or viewfinder. I then twist and turn the lens until i can get that spot as sharp as possible. Remember the stars are above this spot. For instance i focused on the little red light in right bottom corner. I have found that you can not focus on the starts because after about a 20 shots, everything is out of focus.

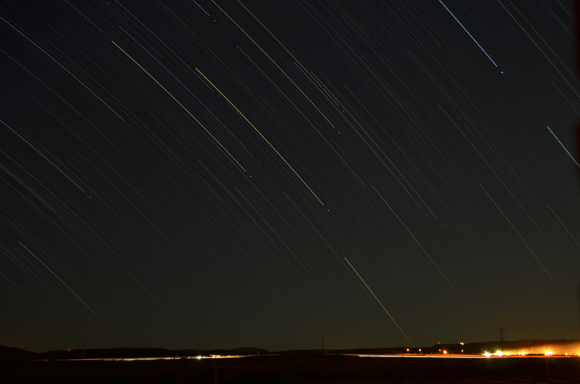
- Star Trails with planes
Ok so now you set your interval timer on the camera. If you do not have one, you will have to take each shot by pressing the shutter or you can by an interval meter if your camera supports it.
Settings on the interval meter – you can set the time that goes by between each shot is taken, i usually set it 30 seconds but you can choose anytime, the shorter the time, the better the trail will be. But remember, you are taking a photo of 25sec exposure, your camera will usually need about the same time to process that photo before it will take another photo. So if i set the camera to 25sec exposure, i set the interval meter to about 40sec – 50sec to allow for processing.
Select the number of shots – the more shots – the longer the trails will be but also the more batteris, time and space you will need.
Ok now that everything is set – let the interval meter start!
After the camera and you have done your thing you have about a 1000 photos, you need to process them.
There are a lot of software out there that stack your photos. I use a program called Startrails, its small, fast and works really well. All you have to do is select all your photos, import them and click build. The program will do the rest. The bigger and more photos you have, the longer it takes.

Star Trails Application Screenshot
Once the program is done you can sit back and take a look at your creation. You can also do post processing in Photoshop or Lightroom.

- Star Trails example after using Startrail software
Troubleshooting:
If your trails look like connect the dots (see example) the time between shots was to long.
If you can hardly see any stars, try making your exposure longer by making the shutter speed longer or you can make your ISO bigger ex ISO 320.
If there i a lot of noise – make your ISO smaller. Too much ISO can cause a lot of “dust speckles” on photos.

- Star Trail Dotted
The best way is trial and error. The more photos you take, the better you will become. O, and don’t forget a lot of coffee! Taking star trail photos make for a lot of late nights!
Happy Shooting!