I had the privilage to attend a HDR workshop held by one of South Africa’s professional landscape photographer’s, Hougaard Malan.
“Landscapes include such an enormous variety of subjects that everyone can enjoy photographing them. They are everywhere. The golden light of dawn and dusk is exceptionally good for many photogenic subjects, and is widely sought by landscape photographers wanting to capture beautiful colours in their images. This light also has lower contrast than the harsh sun of midday. Many landscapes change dramatically with the seasons, and provide exciting new photo opportunities.”
“Basic settings for landscape photography:
■ It’s best to use ISO 100 or ISO 200 to ensure the best quality of digital capture and the lowest noise.
■ Landscape images usually require lots of depth of field, demanding small apertures from f/11-16.
■ Focal length as wide as possible.
■ A solid tripod and remote/cable release always ensure sharp images.
So, what is HDR and why do we use HDR?
Photographers once hindered by the inability of film to faithfully capture the wide range from brightness to darkness, are now hindered by the same limitation of digital sensors.
Dynamic range is the term for a range of tones, from darkest to brightest. Any given scene has a dynamic range, being the range of tones from the shadows through the midtones to the highlights. It can be considered a measurement of the overall brightness or contrast in the scene. The dynamic range that the human eye can see and that we are presented with in the majority of everyday scenery is vastly wider than what any camera can capture…and that is the problem to which HDR is the solution.
Solutions to high dynamic range
1.Graduated ND filters
Graduated neutral density filters are the conventional method of solving this problem. GND filters are rectangular sheets of dyed optical resin of which one half is dark and progressively transitions to the clear half of the filter. When you put it in front of your lens with the dark half over the sky, it will darken the sky to within the dynamic range abilities of the sensor by allowing less light through the dark part. They come in various densities, colors and transition patterns and you need a comprehensive collection of them for diverse scenarios presented in various landscapes. The main advantage is that you get your image in a single exposure.
HDR imaging
The idea is simple…capture the ideal exposure for each part of the image and combine those exposures in Photoshop. Combining the dynamic range of the two exposures into one image gives me a photo with the dynamic range of the original scene as I saw it with my eyes. By combining the dynamic range of two images I have created an image with a higher dynamic range than a camera can produce…hence the name of the technique. In less words…combining the right parts from each exposure gives me a photo with sufficient detail all over.
How to shoot HDR images
To capture it you will use your camera’s auto exposure bracketing (AEB) function. You can set this function to take a sequence of exposures, a certain exposure value apart. The camera then automatically takes an underexposure, standard exposure and overexposure at those set values
Example: In manual mode, you set your camera to a certain exposure and then that is your standard exposure. Now if you set the AEB to capture the exposures 1 stop apart then it will capture the following…
an exposure 1 stop darker than the standard exposure
the standard exposure
an exposure one stop brighter than the standard exposure
This varies in camera models. Refer to your camera manual to find out how to set the AEB on your camera.
Looking through the viewfinder, aim the camera towards the sky to meter the light in the sky. Position the exposure indicator on the right side of the exposure scale, then aim the camera towards the ground to meter it and see how many stops the exposure indicator moved to the left. The value between where it was and where it ends up is the difference between the two and the range you should set your bracketing to cover. If the bracketing covers this range then it simply means that you will have the dynamic range of the entire scene in your sequence of exposures. Capture the sequence as quickly as possible.
These exposures can be captured manually by simply metering the correct exposure for each part and then shooting it by manually setting the correct exposure.
Now that you’ve got the multiple images, it’s time to combine them into one high dynamic range image.
The majority of people use software like Photomatix to create HDR images, but Hougaard suggests Photoshop and the use of layers. In short: 1. stack your images in a layer, 2. Put a mask on the top layer and 3. drag the gradient. I
To get more information regarding editiing visit Hougaard’s blog at www.hougaardmalan.com
HDR imaging is merely a way of overcoming the exposure problems presented by light in everyday scenery. When correctly used, it should take a sequence of bracketed exposures and try to recreate a scene as the eye saw it. It also gives one the ability to solve problematic highlight and shadow problems in landscapes that wasn’t possible in the film days. It cannot improve composition or light and should in no way be considered a shortcut to getting good photos. It’s just a small step in a long chain of procedures one takes to produce good images and one should never forget that the important things are light and composition. Once you have gotten those two primary recipes right, then you can worry about the processing.”
Credit to Hougaard Malan

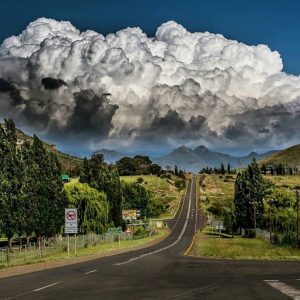
Arniston April 2011 Photo: Denese Lups

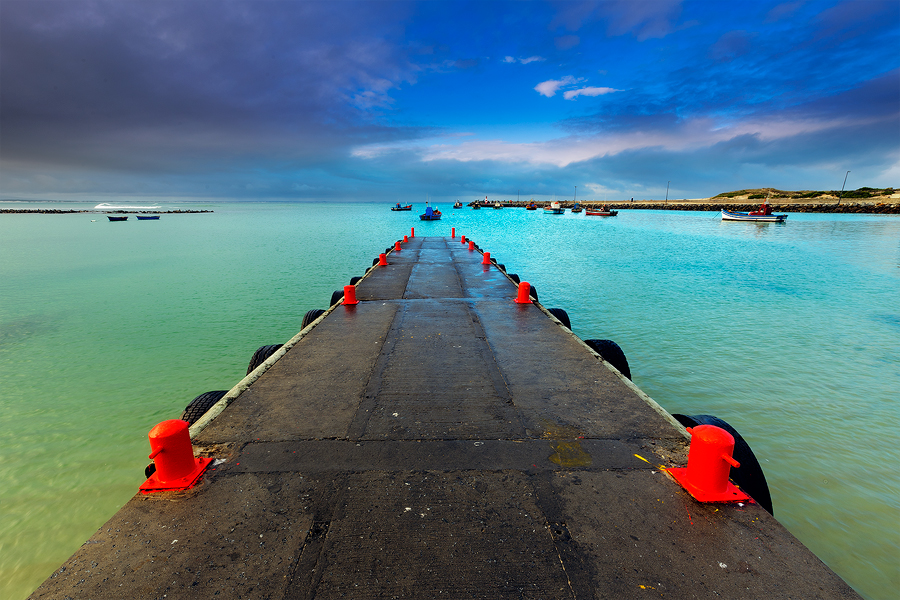
Struisbaai April 2011 Photo: Denese Lups
Also see: HDR for Beginners & Hougaard Malan