Capturing and using your own pictures of your business are far better than using generic stock photography. Actual pictures of your product and your business will sell your product much better than generic photographs that could also be found on other web pages.
Keep in mind that taking pictures for use on the Internet may be rather challenging. You may have heard things like “your subject should not be centred”.
Design principles like that do not apply; these are pictures for a purpose, not for art. Because photos for your business’s website are mostly used to give information rather than art, it requires a “different” type of photography.
Here are some tips that you might find helpful
Planning
Your subject should be centered and you should be away far enough so that all of it is in the picture and close enough so that there is very little [if any] background. Make sure no part of your subject touches the outside edge of the picture.
If possible – plan your shot. If you are indoors make sure there is adequate light. Make sure not to use a flash in front of glass displays, mirrors, pictures or windows. Mirrors are especially bad since you can see the photographer in the picture. If you are outdoors try to have the sun at your back. Try not to take pictures at high noon; early evening is best. Late afternoon fall pictures are the best because the light is better than at any other time of year. By planning ahead you can avoid the pitfalls and get the best shot.
Talk to the designer
If at all possible, and it is best that you do – talk to designer of the website and find out what type of photos they require. I usually make use of very large header images and the dimensions are that of a landscape stretched out. The problem I most often encounter is that people bring me portrait images of a building and request that I use that as the header image. Obviously the dimensions won’t work so I have to stretch and crop the images in order for to fit which results in only a ¼ of the actual image showing which really looks bad.

Relevant pictures
Make sure the images you take for your website are relevant! Let us say for example you have a website for a game farm – what would people like to see on that site and what would you like to show the people who view your website?
There are a number of questions we can ask to determine what that will be:
What is your main focus with this site?
Is it hunting, game viewing or relaxation? These are very important questions because they will determine what your main images will be about.
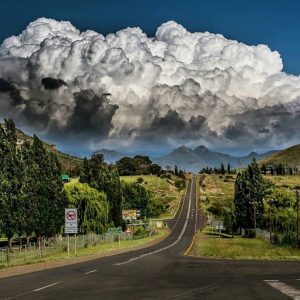
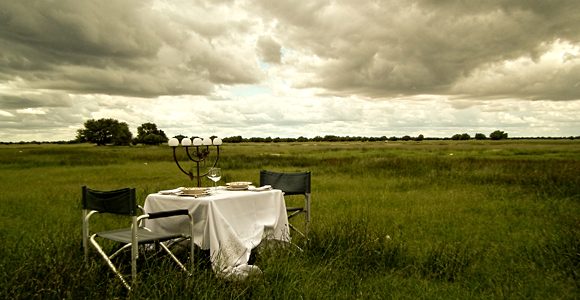
If you say hunting, a nice hunting picture like someone walking with a rifle in the bush (not dead animals) will work great. If you said game viewing, some nice shots of the different kinds of species found will be great and if you said relaxation, something like wide open plains, a great sunset or even a shot of the rooms where your guests will be staying, should work well!

What are your main attractions and marketing strengths at the game farm?
Only focus on your strengths:
If you have nice rooms – make up a room and take some nice shots. (make sure the lighting is adequate) .
If you have rare animals – take lots of photos of them including close ups etc.
If your food is very good, take professional photos of your food with great lighting and very good detail. Lay a stunning table and display all your plates of food on it, that way all the photos you take of your food looks great and inviting.

Ok, but let’s say you have to take photos for your more corporate business, what now?
Try and portray the image and the way clients need to see you in your photos. Keep it clean and simple.
Make sure the staff is wearing something nice on photo day. Keep the desks clean if you take photos of your office workspace.
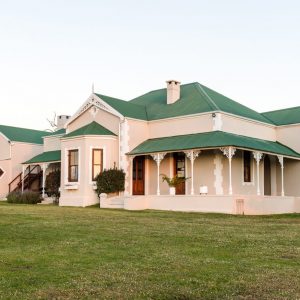
If you want to put a photo of your building on the website of your business, make sure that the building looks nice. No one wants to see a photo of a building with paint peeling off etc and it does not do your company’s image any good.

Make the photos relevant to your site’s content.
If you have an “about us” page on your site, put some photos of the staff members or your offices there. If you have a facilities page, put some photos of your facilities on there. Do not put images in between your content pages of offices parties or birthday celebrations. That is what your site gallery is for.
Make sure your product photos are nice and clean and clearly display your products. No one is going to consider paying R10 000 rand for a camera lens if the photo of the lens is blurred and looks fake.
Size does matter
This is where your designer will be helpful. Give all your photos at the biggest resolution possible to your designer. They will resize and crop the images accordingly. Do not give them images taken by you with your cellphone. The biggest problem I find as a designer is that my clients never want to pay for great looking photos taken by a professional photographer.
I regularly get cellphone images or images taken by someone at their office who has no clue on how to take photos. My response to these images are usually – “well it’s your company’s image and name at risk with these unbearable photos”.
Rather pay a professional photographer for a complete photo shoot and you can use all of the images on the web and for your print campaigns. It just looks better.
There are a lot of things to consider when taking photos for your website but I think we have covered the basics here.

Some quick tips for taking photos.
Use a Tripod
Use a tripod to improve the quality of your photographs. In some cases there just is not enough space for a tripod like in a guesthouse’s bedroom, so try and keep the camera as still as possible to eliminate camera shake.
Lighting
Depending on what your subject is that your shooting your lighting requirements will be different. When natural light isn’t an option setting up some directional lighting will be necessary. If you have 2 lights of somewhat equal brightness or strength set them up on opposite sides of the subject to be photographed. The light is best when it is not directly on the subject but bouncing off of something like a wall or ceiling first.
Clean Background

If you are photographing products , like dvd’s or a piece of jewelery, for your website, a background will be a good way to make the image unified. A neutral or grey background will be optimal to not distract from the subject. Pay attention to backgrounds.
Walls are pretty boring; cluttered backgrounds distract. Images that contain many different colors and lots of small detail suffer most when compressed for use online. Plain backgrounds, especially behind faces, help an image reduce well without becoming confusing.
Save for web!

After the shots are saved and loaded on your computer you may want to go into Photoshop or any image editing software and make some minor image adjustments. May you want to make the shadows darker or crop a photo tighter.
When your image looks good you want to save it for the web. In Photoshop this is an option under the File menu. This compresses the image and saves it at a resolution of 72 ppi for the screen. You can alter the settings to find the best compromise between image quality and file size. Remember – for print we use 250-300ppi but for web it is 72ppi. This allows your file to be smaller which will result in faster uploading time.

Happy Snapping!